
Rendering to Disk
Rendering to disk lets you create Wave files without real-time playback constraints. This bypasses CPU limitations, allowing complex patches to render perfectly at any sample rate.
When to Use Rendering
Section titled “When to Use Rendering”- Your patch is too CPU-intensive for real-time playback
- You need guaranteed glitch-free output
- You want to render at high sample rates (96 kHz+)
- You’re creating final audio bounces for a project
How to Render
Section titled “How to Render”- Replace the Sound Out module with a Wave Recorder module
- Replace the MIDI In module with a MIDI Player module (load your
.midfile) - Set the Wave Recorder properties:
- Time Limit — Recording duration in seconds
- Format — Audio bit depth
- Press Play to begin rendering
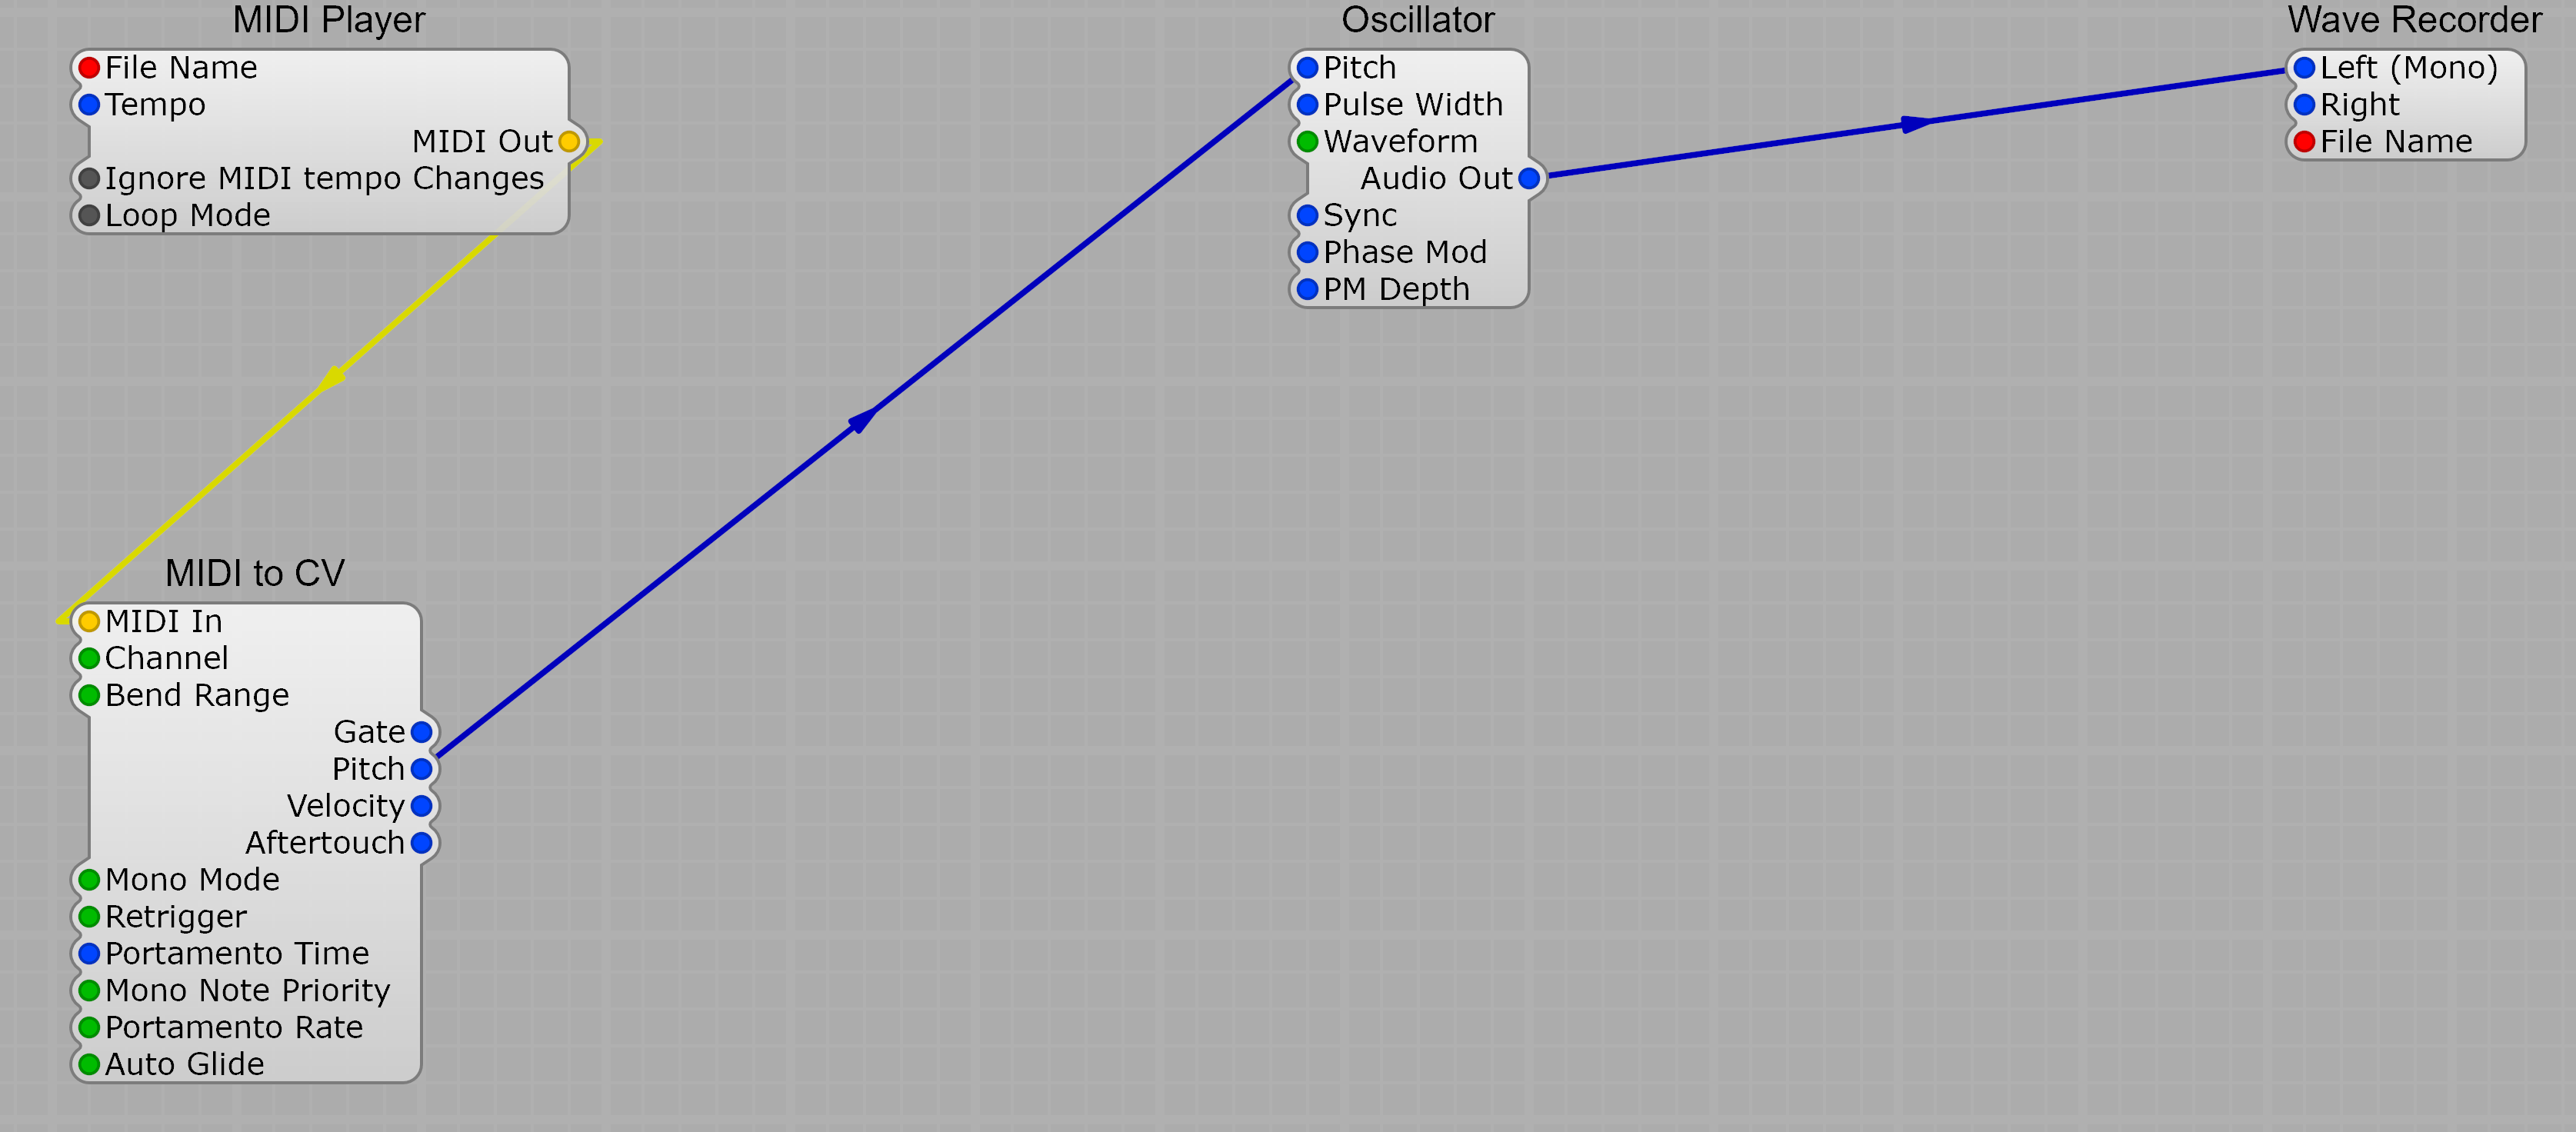
A progress bar shows the rendering status. The audio is processed as fast as your CPU allows, not limited to real-time speed.
Wave Recorder Properties
Section titled “Wave Recorder Properties”| Property | Description |
|---|---|
| Format | Audio bit depth for the output file |
| Time Limit | Maximum recording length in seconds |
| File Name | Output file path |
| Play Wavefile | Automatically play the file after rendering |
| Report Stats | Display rendering statistics |
- The Wave Recorder supports recording multiple tracks simultaneously
- Set the MIDI Player to the correct tempo before rendering
- For the highest quality, render at your project’s target sample rate
- You can render unlimited numbers of synths and effects since there is no real-time constraint